
Fixing a leaky tap is a valuable skill that saves water, prevents damage, and can save you money on water bills. In Australia, addressing such common plumbing problems promptly is not only environmentally beneficial but also aligns with local regulations to conserve water. This guide will equip you with the knowledge and steps to tackle a dripping tap, ensuring compliance with Australian laws regarding DIY plumbing repairs.
Understanding Why Taps Leak
Wear and Tear of Internal Components Like the Tap Washer & O-ring
-
- The washer, O-ring, and valve seat are crucial for creating a watertight seal within the tap.
-
- Continuous use causes these components to wear down over time, resulting in a compromised seal and subsequent leakage.
Degradation of Parts
The degradation process is natural and inevitable, affecting the efficiency of the tap to prevent water from dripping or leaking.
-
- Once these parts no longer fit perfectly or become damaged, water starts to leak through the gaps.
Impact of Hard Water
-
- Hard water contains high levels of calcium and magnesium, which can cause buildup on tap components.
-
- This buildup can accelerate the wear on washers and O-rings, leading to faster degradation and more frequent leaks.
-
- Valve seats, in particular, can become encrusted with mineral deposits, preventing a snug fit with the washer and allowing water to leak.
Identifying the Cause
-
- A thorough examination of these components is essential to pinpoint the exact source of the leak.
-
- Sometimes, the issue might be with a single component, like a worn-out washer, or it could be a combination of factors, including both the washer and the valve seat.
-
- Identifying whether the leak is caused by a faulty O-ring, a deteriorated washer, or a damaged valve seat helps in applying the correct fix and ensures a successful repair.
The Role of Maintenance
-
- Regular checks and maintenance can identify early signs of wear and prevent leaks before they start.
-
- Replacing these components as part of routine maintenance, especially in areas with hard water, can extend the life of your taps and reduce the likelihood of leaks.
Tools and Materials You Will Need to Fix a Dripping Tap
Before tackling the common cause of a leaking tap, it’s essential to have the right tools and materials on hand. Fixing your leaking tap not only requires patience but also a basic understanding of the tap’s mechanism and the parts involved. Whether it’s a washer, O-ring, or the jumper valve that needs replacing, having the correct items from your local hardware store will make the job easier and ensure a successful repair. Here’s what you’ll need:
-
- Adjustable Spanner and Pliers: Necessary for loosening and tightening the nuts that hold the tap together. Using a spanner or plier can help remove the tap handle and bonnet without causing damage.
-
- Screwdrivers: Needed for removing screws that secure the tap handle to the tap body. Ensure you have both flat-head and Phillips-head screwdrivers to match the type of screws in your tap.
-
- Replacement Washers and O-Rings: The most common cause of a leaking tap is a worn-out washer or O-ring. Visit your local hardware store to get replacements. Make sure they match the size and type of tap you’re repairing.
-
- Jumper Valve: If your tap is still leaking after replacing the washer and O-ring, the jumper valve attached to the spindle may need to be replaced.
-
- Lubricant: Helps in reassembling the tap easily, ensuring a smooth operation when turning the tap on and off.
-
- Cloth and Cleaner: To clean the tap body and parts during disassembly. A clean tap will ensure a better seal when put back together.
-
- Repair Kit: Many hardware stores offer tap repair kits that include all the necessary parts and tools for fixing common plumbing issues related to taps.
Step-by-Step Guide to Fixing a Leaking Tap
1. Turning Off the Water Supply
Begin your repair by turning off the main water supply to prevent water wastage and damage. This can be done by locating the main valve, often found at the property’s boundary or under the sink, and turning it clockwise. Check that the water is completely off by testing another tap in the house.
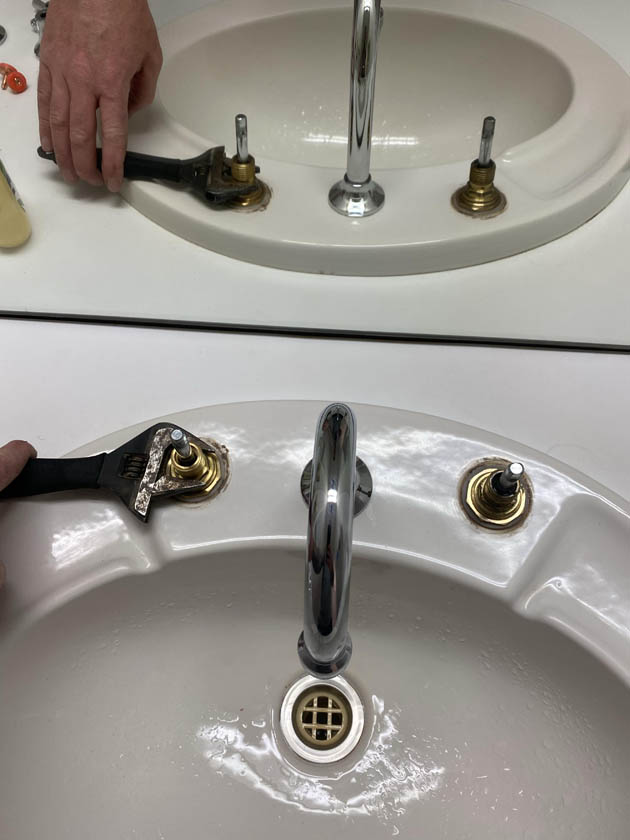
2. Disassembling the Tap
Remove the tap handle by unscrewing any visible screws or the cover plate, then use a wrench or plier to unscrew the tap bonnet, exposing the internal components. Organise the parts in the order of removal to ease reassembly. Keep small components like screws in a container to avoid losing them.
3. Identifying the Cause of the Leak
Inspect the tap’s internal parts, focusing on common culprits like the washer, O-rings, and the jumper valve for any signs of wear or damage. Check the valve seat for corrosion or debris that could prevent a proper seal. Identifying the damaged part is crucial for effective repair.
4. Replacing the Faulty Parts
Replace any worn-out washers, O-rings, or the entire jumper valve with new parts from a local hardware store, ensuring they match your tap’s specifications. For valve seat issues, use a reseating tool to smooth out irregularities, though some cases might require professional help. Correct replacement is key to stopping the leak.
5. Reassembling the Tap
Carefully reassemble the tap by reversing the disassembly steps, ensuring new parts are correctly positioned and the tap bonnet is tightly screwed on without overtightening. Reattach the tap handle and any decorative elements, then slowly turn the main water supply back on to test the repair. Observe for leaks when the tap is turned on and off to confirm the success of your repair
Testing Your Work
After reassembling your tap, it’s crucial to test your work to ensure the leak has been effectively fixed. Slowly turn the water main back on at the mains, reintroducing water supply to your home plumbing system. Open the repaired tap to let any air and water left in the pipe flow out, checking for leaks or dripping. Observe the tap when it’s both on and off; a properly repaired tap should not leak, and water should flow smoothly when turned on. This step is essential in verifying the effectiveness of your repair and preventing water damage, ensuring that the washer and jumper valve replacement or any other fixes have resolved the issue.
Preventive Measures to Avoid Future Leaks
Leaking taps can cause unnecessary water wastage and contribute to water damage, making it essential to adopt preventive measures:
-
- Regular Inspections: Regularly check your taps for signs of wear or damage, especially the tap washer and O-rings, as these are often the cause of leaking taps. Early detection can prevent leaks from worsening.
-
- Water Hardness: In areas with hard water, consider installing a water softener to reduce mineral buildup on plumbing fixtures, which can cause leaking taps.
-
- Replace Worn Parts Promptly: If you notice wear on parts like the tap washer attached to the jumper valve or the O-rings, replace them before they fail completely. Keeping spare parts on hand can make this easier.
-
- Professional Maintenance: Schedule annual check-ups with plumbing services to ensure your home’s plumbing is in top condition. Professionals can provide an accurate assessment and address issues that DIY efforts may miss.
When to Call a Professional Plumber for a Leaking or Dripping tap
While many leaking tap issues are easy to fix with basic DIY home improvement skills, there are situations where calling a professional plumber is necessary:
-
- Complex Repairs: If the tap is still leaking after you’ve replaced the washer and jumper valve or if you’re unable to identify the cause of the leak, a plumber can diagnose and fix the issue efficiently.
-
- Lack of Tools or Knowledge: If you don’t have the necessary tools or feel unsure about completing the job correctly, it’s safer to enlist plumbing services. This ensures the repair is done right, avoiding potential water damage.
-
- Major Plumbing Issues: Leaks stemming from within the wall or pipes can cause significant damage and require professional intervention. Plumbers have the tools and expertise to address such problems without causing further damage.
In any of these scenarios, it’s advisable to call a plumber like Plumbwell Plumbing Services in Sydney on (02) 9064 2861. We can provide a comprehensive solution, ensuring that your leaking tap is fixed correctly and offering peace of mind that your home’s plumbing system is in good hands.